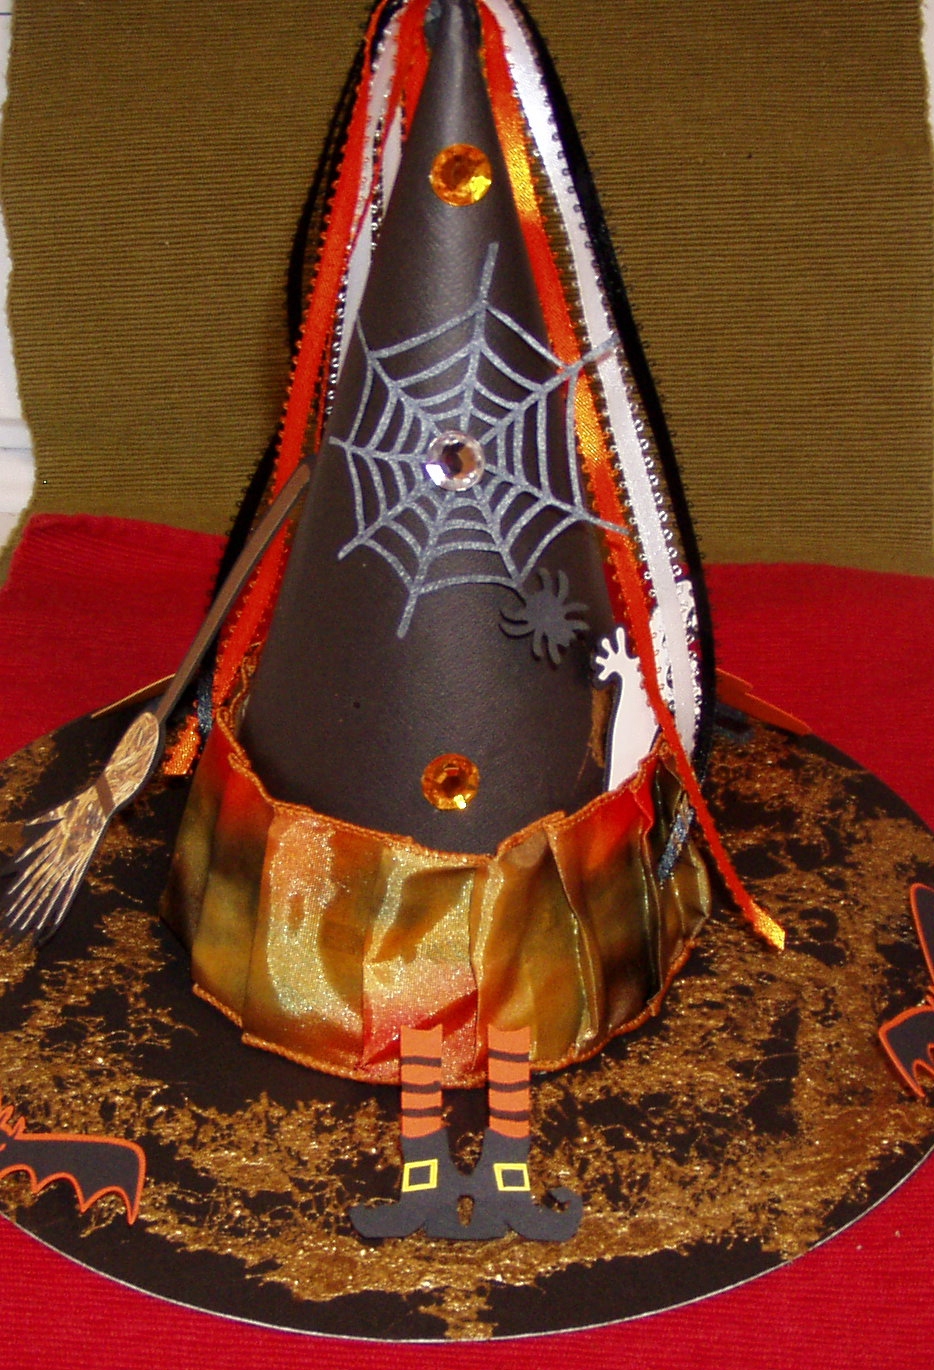

Here are the steps to make the hat:
1. Roll paper into a cone shape for the top of the hat.
2. Cut a 10" circle out of black paper and another 10" circle out of chipboard. Mount chipboard under the black paper to make it more sturdy. To "cover" the edge of the gray chipboard, I used a black Copic marker and ran it around the edge of the chipboard.
3. Cut orange, black and white ribbon. Used heavy duty double sided tape and wrapped it around the end of the ribbons. Inserted into the tip of the cone.
4. Taped cone closed using heavy duty double sided tape.
5. Folded multi-colored wire ribbon for the band of the hat and used the double sided tape to attach for the band around the hat.
6. Sprayed gold webbing spray around the brim of the hat. It came out really heavy. (What I should have done was gone outside and sprayed the 10" circle for the brim of the hat before I attached it to the cone).
7. I used to belong to a design team that is no longer in business, but I had a bunch of Halloween cutouts already in my stash so I attached them around the hat. I used bats, witches legs, a cauldron, broom and pumpkin. To make the cuts stand up, I used black foam mounting squares. I put one square on the back of the cut design and then butted it against another foam square that I put on the brim. This way it makes the designs stand up.
8. Attached 3 gems to the front of the hat using thick glue dots.
Now all I have to do is pick up my pumpkin tomorrow, hubby will carve it and set the witches hat on top and we will have a cute decoration for our front window! I'll post a photo of the pumpkin once we get it done. We love decorating for Halloween!!
I hope I've inspired you to take something from ordinary and turn it to extraordinary!
Debbie
1 comment:
Very nice!!! I really like this!
Post a Comment