Showing posts with label Creative Memories.. Show all posts

Wednesday, November 7, 2012

Here's How I Store My File Cuts

Yesterday I posted an idea about how I store my file cuts on the EasyWishbladers group. It's a very easy way to keep track of the files that I cut with my cutting machines.

I use the older big square version of their Power Sort Box that was designed to hold like 600 photos. I wish they would have kept this size  box but now they have a slimmer model. Anyway, inside it holds 12 divided Compartment boxes. I also use  the Power Sort Dividers that I labeled with my Dynamo Labeler. I like that the box is plastic, yet sturdy. If something were to get spilled on it or dropped on it, I know my files are safe inside. There is quite a bit of space inside so I can really load this box with lots of file cuts.

Here are the photos:

Creative Memories Power Sort Box
(older version)

Inside Cover

Divider Boxes with Labeled Divider Panels

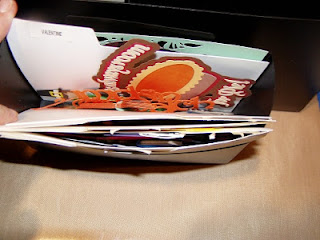
Thanksgiving File Cuts

I have large file cuts that will not fit in the divider boxes, so those are kept in the storage compartment that is built into the lid. This gives you an idea how to keep your file cuts all in one place. If I find a design that I like, I will cut it more than once in different colors or even in just white, so I can decorate it later in the colors I need. It really can't get any easier than this!

Hope this tip helps you in some way. Have a great day!


Tuesday, October 2, 2012

Tuesday Tips and Tricks

Today is the start of Tuesday Tips and Tricks. I am a member and moderator at http://groups.yahoo.com/group/easywishbladers/, and we are implementing tips and tricks for crafters using our cutting machines and other techniques.

Today's project is a Fall/Halloween broom that only took an hour to make. I love how it turned out and it fits perfectly in with my tablescape on our dining room table. Here's what it looks like:


The supplies I used were:

Brown Cardstock - 11" x 4 1/4" (broom handle)
Yellow Cardstock - 7" x 4  ("straw" bottom of broom)
Scraps of Dark Red, Orange, Dark Green, Apple Green and Tan card stock (leaves and acorns)
Cuttlebug "Forest Branches" embossing folder
 Orange ribbon with white and olive green flower print
Small leaf punch - CM
Wishblade used to cut oak leaves
2 Gold Metal Pumpkin Brads
Red double sided tacky tape 
Needle to poke holes in log for brads
SU  Chocolate Ink pad and sponge
SU Dimensional foam used under the backside of the pumpkin brads
Stickles
Brown twine
Glue, glue dots or hot glue

*For my oak leaves, the veins cut out of the center so I cut a solid oak leaf and glued that to the back of the top oak leaf. I used copper and green color Stickles, and filled in the cut out veins and let those dry overnight.

Roll the chocolate card stock into a broom handle shape and seal 11" side with tacky tape. Using a sponge and the brown ink pad, sponge color all over the yellow card stock. Take a ruler and yellow card stock, along the 7" side, draw a line 1/2" down from the top. This is where you stop cutting your fringes. Take a scissors and cut fringes from the bottom of the 4" side, up to the line you have drawn. Attach a strip of tacky tape along the top of the yellow card stock and attach it to the broom handle. The bottom of the fringe should be even with the bottom of the brown card stock. Run a strip of tacky tape along the top of the attached yellow card stock. 

Starting at the top of the broom handle, attach ribbon and wrap it around the broom handle and attach it to the top of the yellow cardstock. Wrap twine around the top of the yellow cardstock, hiding the end of the ribbon and top of yellow card stock. Using glue, glue dots, hot glue, or foam dimensionals, attach leaves to top and bottom of twine. I overlapped the leaves for dimension.

Poke a hole on the upper part of the broom stick and also a hole above the top row of leaves and attach pumpkin brads. Your broom is complete!

Like I mentioned earlier, it only took an hour from start to finish. It really is an easy project. My next broom is going to be 24" tall and I think I'll make a bunch of small ones as little gifts for an upcoming scrapping weekend I will be attending this month.

Hope you can take the time to make this project. I'm sure the kids would love to help! 

Have a great day!

Debbie


Saturday, August 25, 2012

5 Star Card

Recently I re-discovered a wonderful lady who is responsible for my interest in scrapbooking and cardmaking. I discovered DIY Scrapbooking 8 years ago with Sandi Genovese while I was at home recovering from heart surgery. I started watching her every day and I couldn't get enough of what I was seeing. Once I started getting my strength back, I started scrapbooking. What a wonderful hobby! So after the show was discontinued, it was like an old friend who had moved away and never to be heard from again. Well, I don't know what made me Google her name recently but to my surprise, she has an online show called Scrapbook Showgram - Scrapbooking with Sandi Genovese at you can find her at : http://scrapbookshowgram.com/. She has videos of her projects and you can follow along. I'm loving it. So having said all this, here is my take on Sandy's 5 Star Birthday card. I changed it up and will be giving it to a friend who also has her own scrapbooking club at her house which I try to attend 4 times a month. We have an 18 hour scrapbooking weekend coming up in October and it's just a little something to give her for being such a wonderful hostess. Here are the photos of my card. I tried to use CM as much as possible since she is a CM rep and I used mostly the CM Cricut carts along with Storybook Creator 4 to print background papers. Hope she likes what I've done!

Page 1 Heritage/Memories using Cricut Heritage Cart and CM Storybook 4 "Serenity" paper.
Spring - CM Storybook Creator 4 background paper and CM border.

CM Cheerful Seasons Cart along with CM  Disney Sticker at the top.


Fall - CM Cheerful Seasons Cart

Christmas - CM 'Tis The Season cart
Hope you enjoyed the photos and have a wonderful weekend.
Debbie
Related Posts Plugin for WordPress, Blogger...